Thursday, July 3, 2014

Graduations!

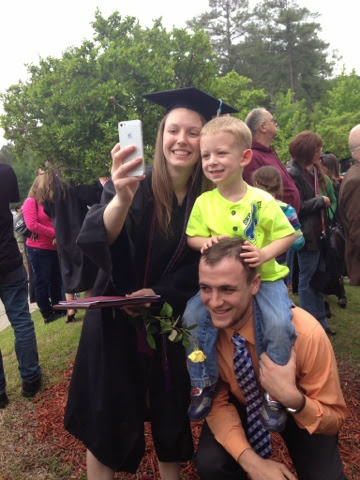
So this May, I was lucky to go to two of my siblings' graduations. Both graduated from the University of Arkansas at Little Rock. It was a lot of fun to get to see family.  Athena graduated in the morning in Education.


The kids got a little bored, but were excited to see Athena. 


Ryan graduated in the afternoon in construction management. Yes, they did the same speeches over again, but it was cool to see both of them graduate!


Below is a picture of all the siblings that were able to be there. Yes, I know, I am short.


Congrats Athena and Ryan!

Fun Christmas ornaments!

This past Christmas, I was in charge of an activity for YW.  We made different ornaments. Below are some of the samples I made. I got the idea from Pintrest.

This first one is taking a clear glass bulb and squeezing paint inside it.  As it dried, the paint moved around. If you rolled it to different sides, it changed the paint.  I put too much in thinking I didn't have enough so it took longer to dry. It looked really cool when it was finished. 


This next one is a christmas tree made out of buttons.  I hot glued them onto a white piece of cloth.  I put this into a frame. 


The next idea I remember doing in elementary school.  I took puzzle pieces and made a wreath. I used pieces with green on them, but some of the girls actually painted their's green. I would have made it a little thicker if I did it again. The holly is red sequins. 


This next one took patience but looked really cool when it was finished. You take a ribbon and little beads and string a clear piece of string through them. You have to make each one a little smaller or bigger than the last one (depending upon if you are starting at the top or bottom). When you are finished, you push a metal ornament hook through it so you can hang it on the tree.  


We had a lot of fun. I hope to make more this next year or even learn how to do different ones as well.


Our First Grade Garden

So these next few posts have been halfway done for awhile. I get the pictures ready on my app but then like to type using the computer. I finally finished them! 

In first grade, we plant a community garden.  This year, due to many factors, we only planted beans and radishes.  My class planted the back row of beans and the right side of the radishes. I don't think I got any pictures of the plants as they got bigger.  I will have to go back and check. 


In this next picture, it is a close-up of radish plants.  You can see the red part of the radish right at the soil. 


Below are close-ups of the bean plants. The tan things hanging on the stem just below the leaves are what is left of the seed. 


We also had a rain gauge. Students thought it was interesting to see how the rain fall could differ. 


Students would come outside and record using pictures and words the changes they noticed in the garden. We would often discuss what they saw. Also, at the end, students got to take home radishes and beans to eat with their families. They thought it was so cool to pick them!


Tuesday, June 3, 2014

Fun at Disney's Hollywood Studios

I just found these pictures from last summer! I went and saw Brent at work and decided to stop and take some pics! 


These I took for my nephew. 


Cute Door for Teacher appreciation week

My room decorated my door for Teacher Appreciation week last month. Look how cute it is! 

Sunday, May 25, 2014

I just updated!

Yay! I started five of those posts a couple months ago and then life got busy.  I saw them and realized they wouldn't take long to finish.  So I did and then added some more.  They are all out of order but you can see some of the things I have been up to this year.  I have a lot more to do, but at least it is a start! Enjoy!

Little Miss' doll

So I made my niece a doll for Christmas.  It wasn't too hard but not super easy either.  I looked at lost of tutorials I found on Pintrest and came up with my own.  
First, I drew the shape I wanted the doll to be.  

Next, I cut out the fabric (both pieces at the same time). 
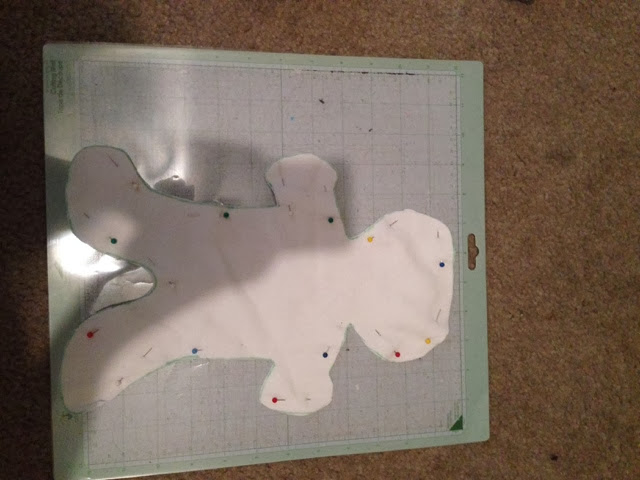


I sewed around the edge leaving a whole at the top of the head.  I then turned it right side out. 


You can see the hole I left in the next picture.  


Next, I stuffed the doll and sewed up the top.  I don't always do a pretty job.  I wasn't worried about this because I knew I would be putting hair on the doll.  


This is the doll before I added anything.  It's not too bad. 


Next, I cut out hair out of fleece.  It's softer than felt (which is what most people use) and solid so she couldn't tangle her little fingers in yarn.  It is two pieces that I sewed together.  I put a couple stitches in to keep it on her head.  


Next, I sewed on blue buttons for eyes. 


I attempted to make a dress.  I liked it until this point.  She doesn't care, but next time I hope to make better clothes.  


I also used a scrap to make a little blanket for the doll.  


And.....She loved it!


Tooth fairy

We read this really great book.  The cover is the picture below.  The tooth fairy is a hot topic in First Grade.  This book helps explain why the tooth fairy looks different to each person.  The students loved it! 


Below is another class' response to what they think the real tooth fairy looks like.  In the book, it talks about how children don't see the real tooth fairy because it would scare them.  To help with this, the tooth fairy takes on the image of someone the child trusts.  My students art didn't get hung up for this.  There written response went home with their pictures.  I had my students do a painting of what their tooth fairy looks like when they appear.  It didn't go as well as having the student think of what the real tooth fairy looks like.  I hope that makes sense.  


Is it a worm or a caterpillar?

Guess what we found on the playground? Well we didn't know for sure at first either.  The students all had an opinion and so we did some research. This was a group activity.  Below is the Venn Diagram we did to decide if it was a caterpillar or a worm.  


After we did that, we did some research to find out.  We discovered it is actually an inch worm which is a type of caterpillar. The students each wrote about what they learned and we made the display below.  


Disney fun!!!

So the following are just some fun pictures from earlier this winter/spring (it never got very warm). They were all taken at EPCOT.  Enjoy!


How Many People Can your boat hold?

So there is this really fun and exciting experiment where students build aluminum foil boats.  Before they do, we talk about what a boat is and what shapes might be. After they have all built one, with no tape or glue, we put it in a tub of water and see how many people it can hold before it sinks.  The students love this activity.  I didn't get any pictures of the boats with the students this year.  If I think about it, I can post some from last year later.  The activity takes a long time but it is worth it in many ways.  We have to count each of the people which can be a struggle for some of the students (this year we did it at the beginning).  


After the students finished, we wrote in our science journals.  The students were able to record what they did and what they learned.  


We also had this chart with their estimate and the actual number their boat held.  When we finished, we discussed the best way to fold the boat so that it can hold the most people.